Create Work Schedules
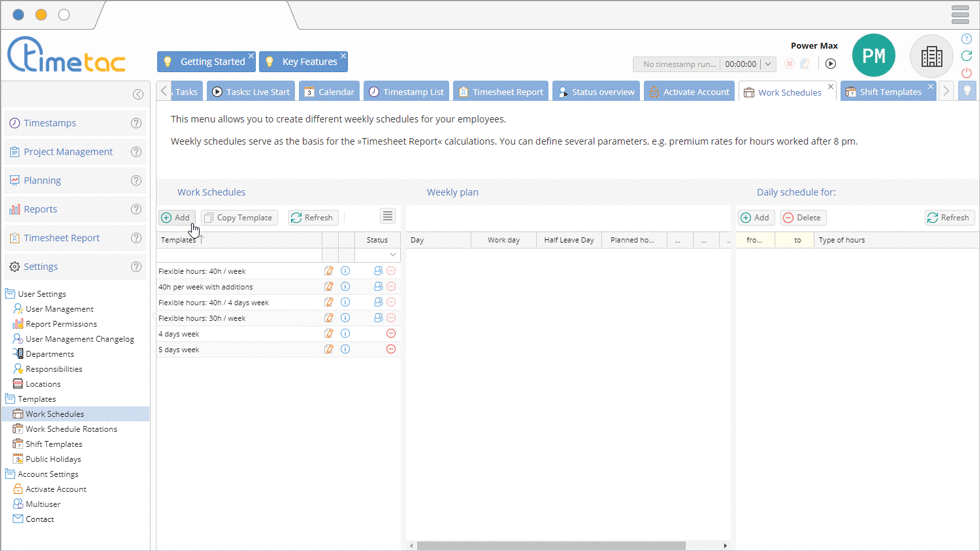
First of all work schedules need to be created. Navigate to the side menu Settings – Work Schedules and create the needed work schedules.
Create a new Work Schedule Rotation

To create a new shift template navigate to the menu Settings – Work Schedule Rotation. Click on Add and name your shift template. Already created work schedule rotations can be deleted at any time.
Allocating Work Schedule Rotations
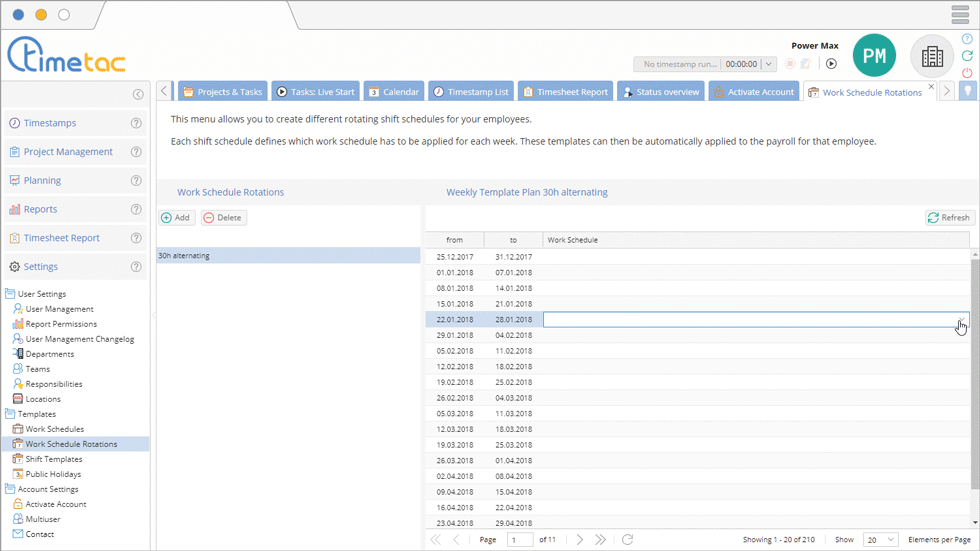
After you have created a shift schedule, you must assign the correct work schedules to this shift template. Each line represents in the column Weekly Template Plan shows you exactly the start and end date of the desired week. Double-click in the column Work Schedule. Now you can open the dropdown menu by clicking on the small arrow. Select the desired work schedule.
Allocate Users to a Work Schedule Rotation
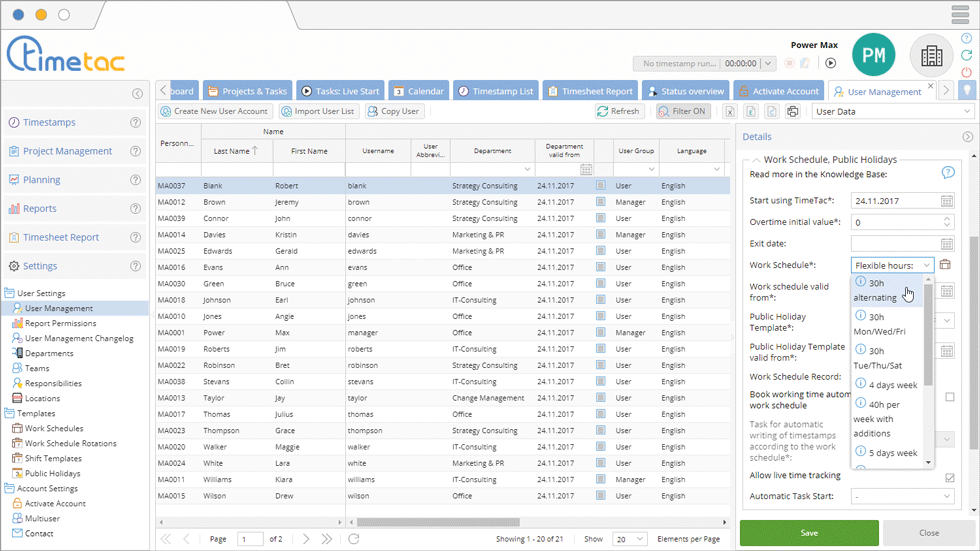
After creating a shift template and filling in the weekly plan with work schedules, you have to allocate the work schedule to an user. Navigate to the menu Settings – User Management. Click on the desired user and open the menu Work Schedule, Public Holidays. Now you can allocate the work schedule to the user. Select from which day on the work schedule should apply and click on Save.


