Thank you for choosing the Project Time Tracking solution from TimeTac. The following are recommended steps to get used to TimeTac and to optimally setup your account so that it is ready for your employees to use.
First Steps
-
Login
You can use TimeTac in any modern desktop browser by navigating to go.timetac.com/(accountname).
Enter your Username and Password, then proceed to login.
Read more: How to Use TimeTac
-
Dashboard
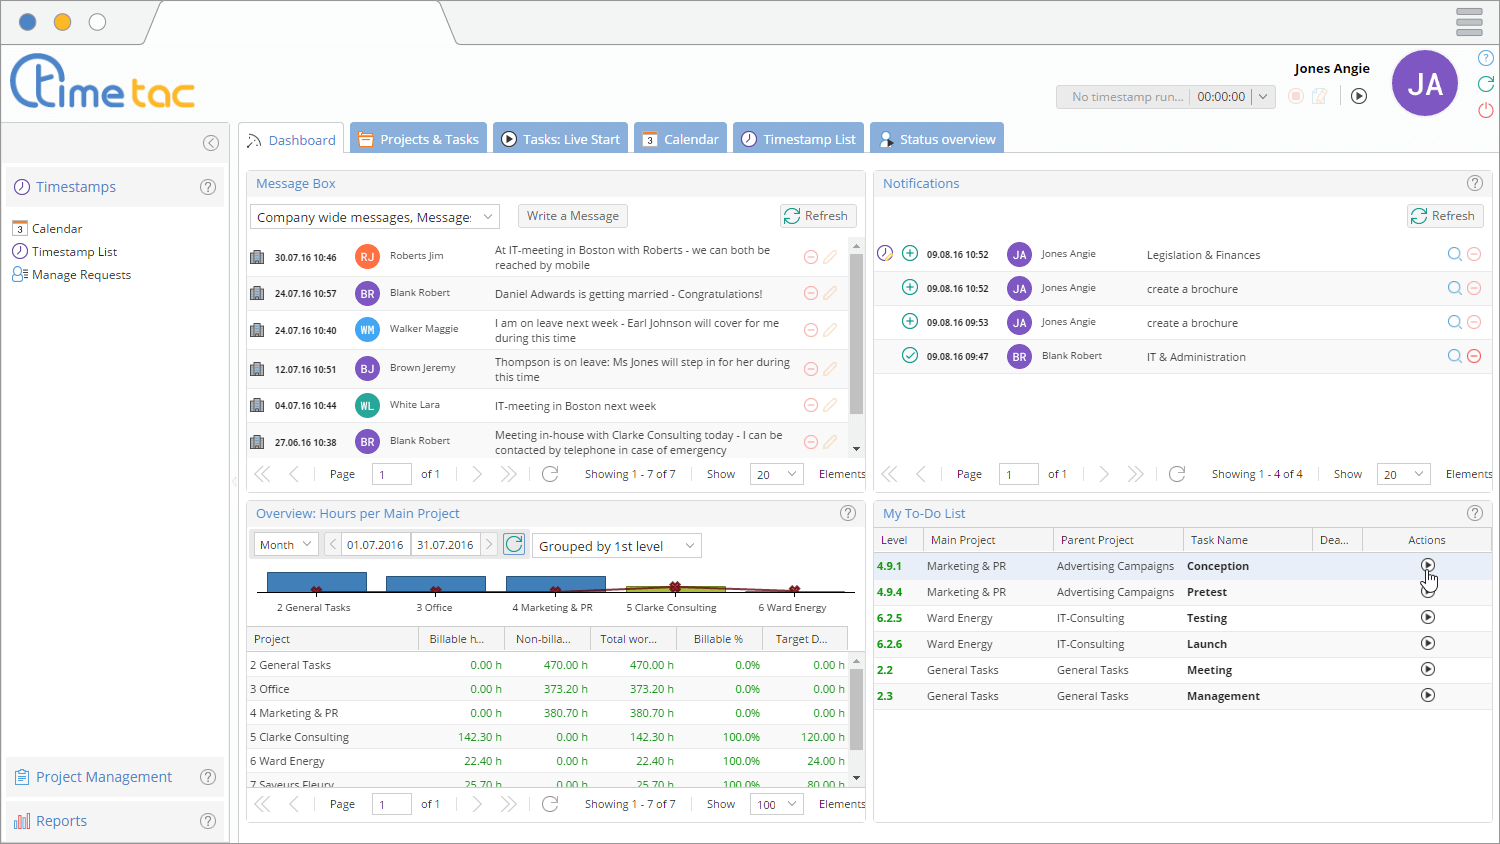
The is the homepage of TimeTac, showing you key information, such as working hour statistics, notifications and messages from other employees.The main options are displayed in tabs across the top. There is also a side menu on the left-hand side. You can open and close this by clicking on the arrow button located near the top.
Read more: Dashboard
-
Change your Password and Contact Details

As we are currently on the , click on the button. This can be found in the top right corner of every screen.Read more: Change User Details and Password
-
Start and Stop your First Task


You can use the Quick Start in the header area to search for your desired task. There are additional buttons here for taking a break, adding a memo to the current timestamp and stopping your current task. If you are currently tracking a break, then the break button will allow you to quickly start your previous task once again.
We can also stop and start tasks from the Project & Tasks tab. Switch to this tab, then click on a plus symbol beside a project folder icon. This will display the tasks within that project. You will notice that each task has a play symbol beside it. Simply click on this to begin time tracking.You can stop time tracking by clicking on the stop symbol beside the task. Alternatively, you can also click on the play symbol beside another task to switch between activities.
There are other methods of tracking your time, all of which are described in the below article.
Read more: How to Track Time
-
View your Working Time
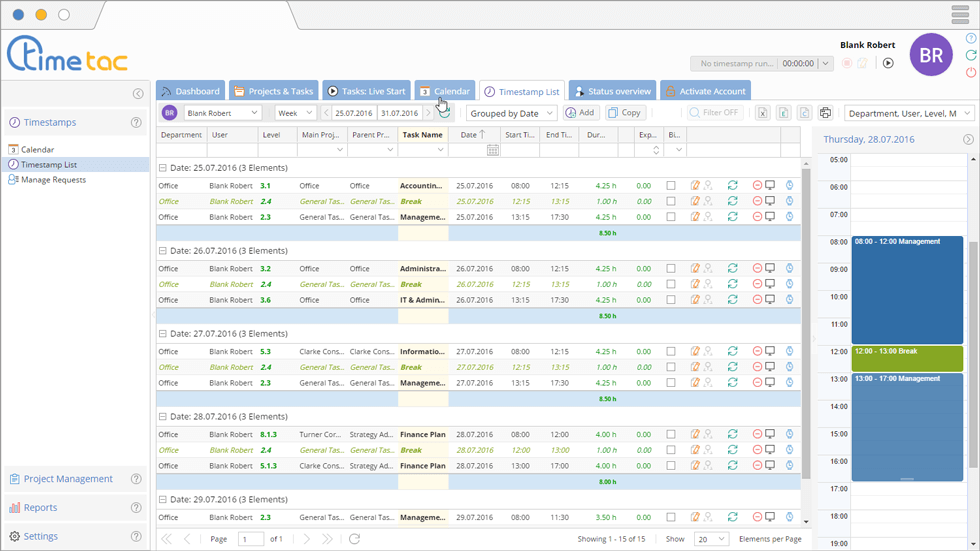
Working times are stored as Timestamps in TimeTac. These are records of the start time, end time, duration and some other details regarding each time tracking event. Click on the menu and select Timestamp List to see a display of your working hours in a detailed format.Alternatively, for an overview of working hours, you can also click on the display too. Both displays have numerous filters in the left-hand side menu to filter the exact data you wish to see. You can also request alterations to working times here, should there have been any errors while time tracking.
Read more: What is a Timestamp?, Timestamps List View, Calendar
-
Status Overview Screen
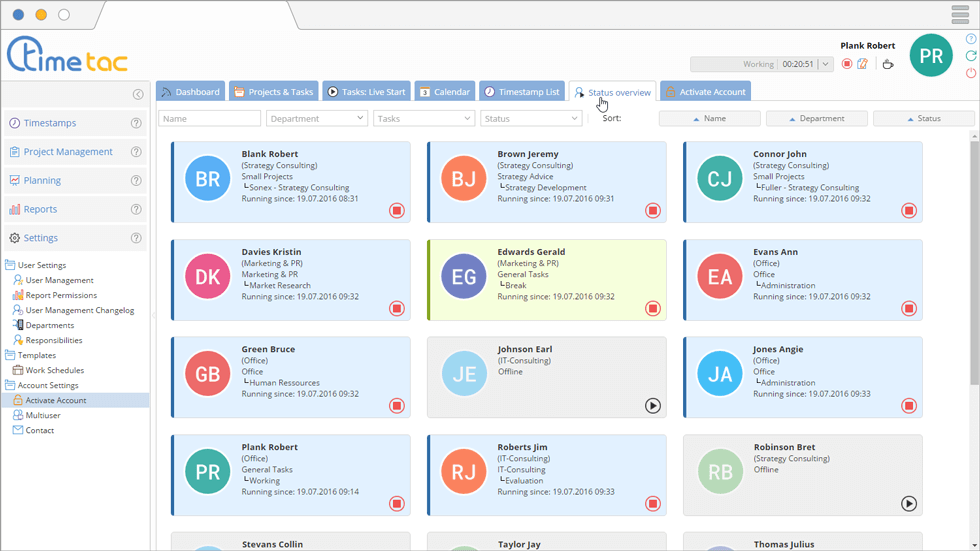
The tab shows you the current working status of other employees within your department. Only Managers have access to this screen by default, but it can be enabled for individual Users as well. This is convenient for seeing who is currently online, absent, sick etc.Read more: Status Overview
-
Reports
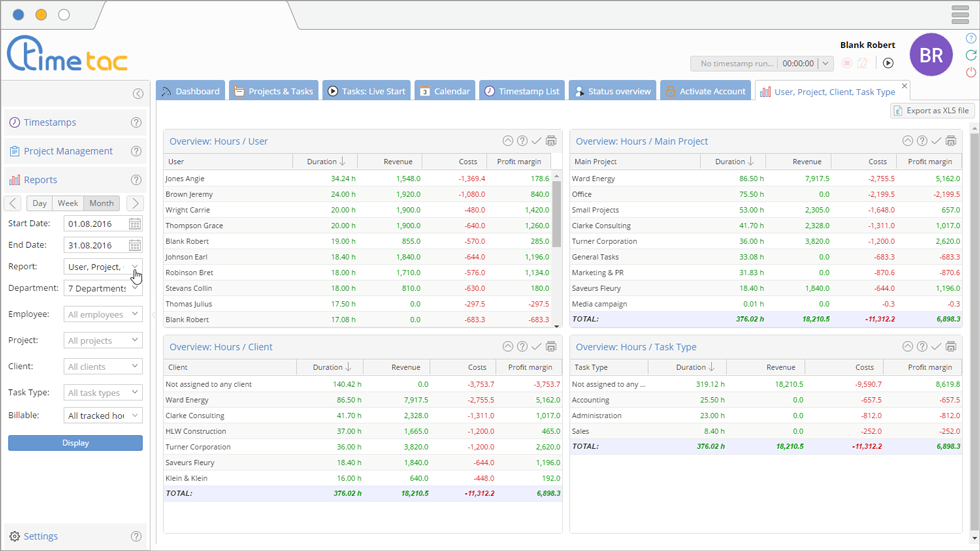
The menu allows you to produce detailed reports of working hours, with each type of report having a largely different emphasis, ranging from statistics per employee and project, to statistics per task type and client.Read more: Statistics
-
Create Projects and Tasks
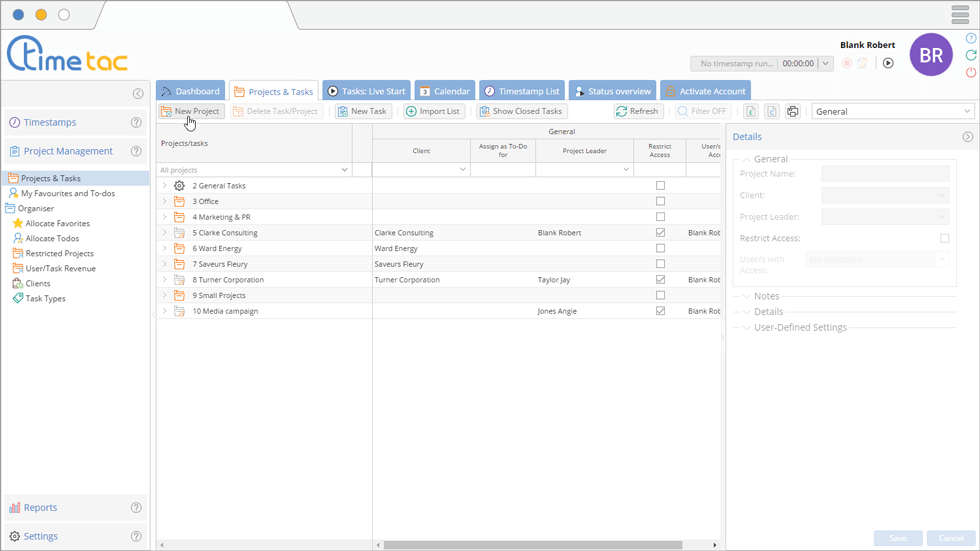
Now that we have looked at the features of the time tracking solution, we can start to setup the account for your company. Navigate back to the menu, and begin to create a few projects and tasks which would represent activities in your company.You don’t need to create every project and task just yet. You can easily add more later on.
Read more: Create Projects and Tasks
-
Clients
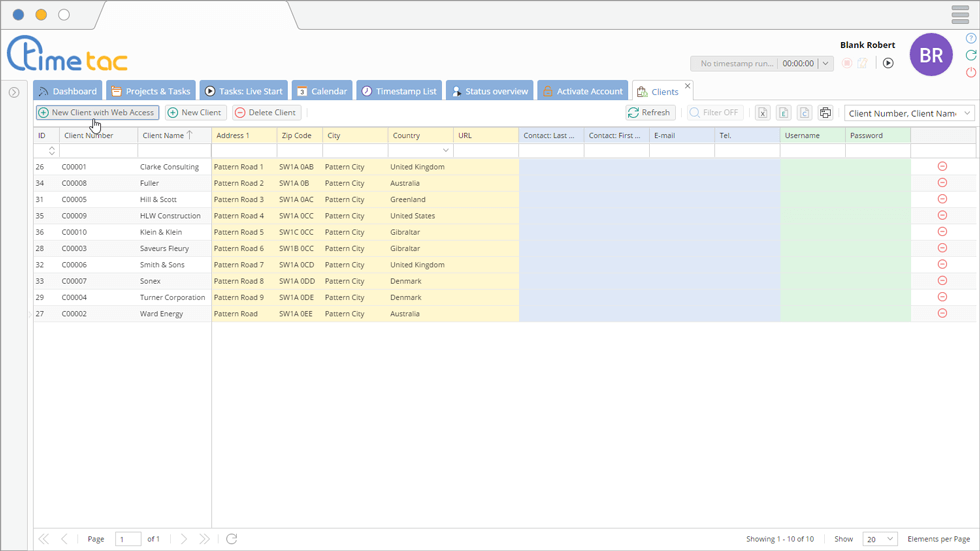
You may have noticed that you could assign clients to projects. This allows you to produce reports for specific clients, which is particularly useful if that client is involved in more than one project. The screen allows you to create and edit the core contact details for each client. You can even grant them limited access to your TimeTac company account, so they can freely view reports of working time relating to their assigned projects. -
Create Departments
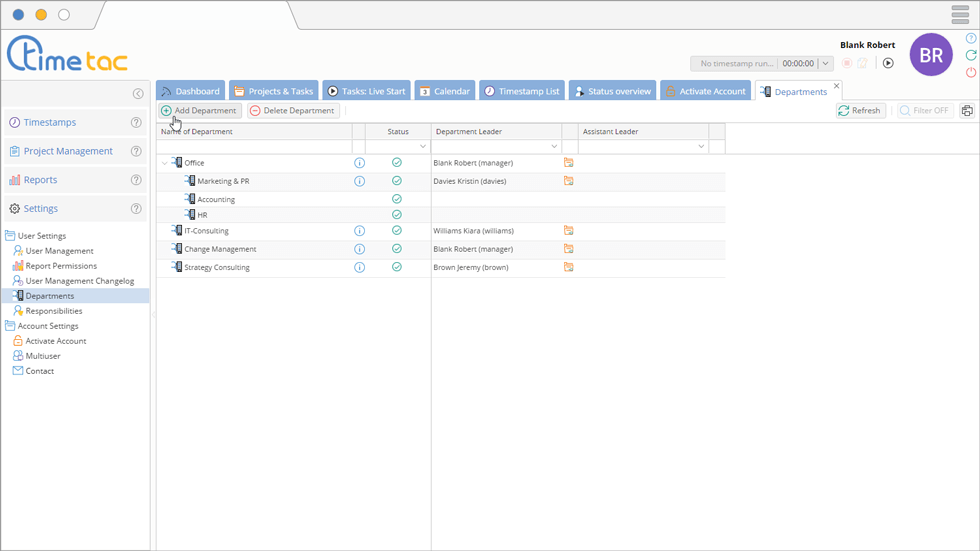
Now it’s time to start preparing the account for other employees to use. Firstly, start by creating departments and organising the department structure of your company as you wish. Even if you are a small company with no departments, it’s still worth learning about the features of departments as you will learn more about which data employees can view within your company.Read more: Create Departments
-
Create User Accounts for Other Employees
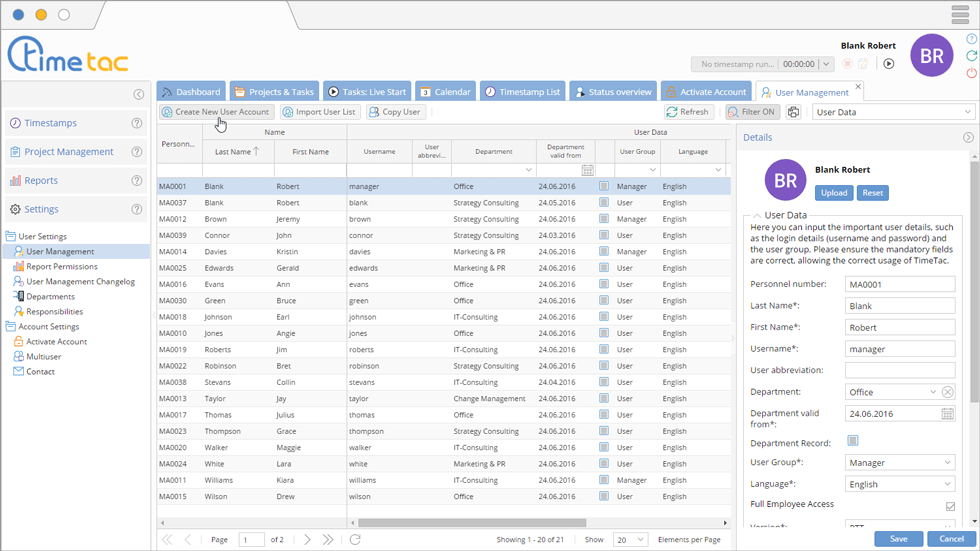
It is recommended to read the articles about individual permissions and user types in TimeTac before creating users. Once you have this knowledge in mind, you can then create a user and modify their permissions as you see fit. You can make the entire process of account creation much quicker and more efficient by copying a pre-existing user with the desired permissions.If you are a large company, then there are also options to import multiple users at once.
Read more: Types of User, User Permissions, Create User
-
Responsibilities
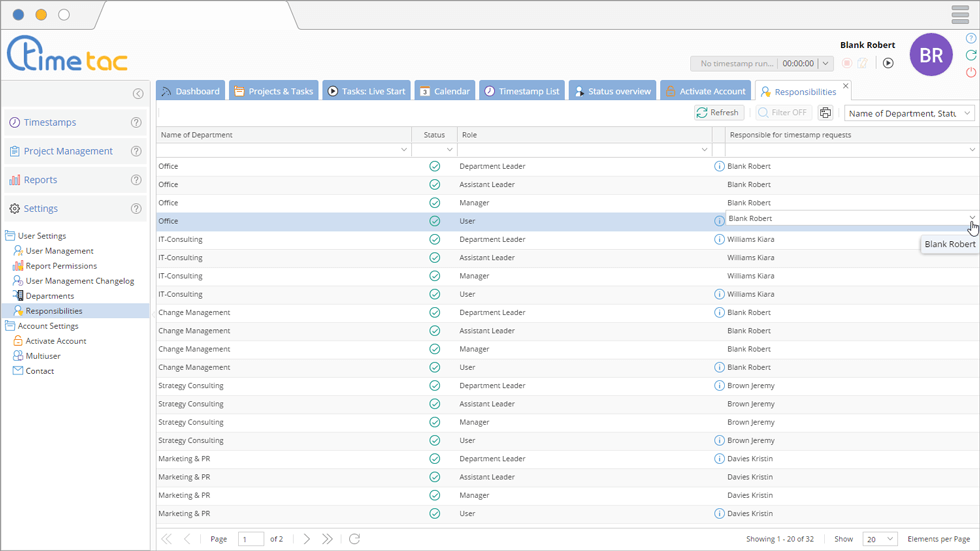
The menu allows you to define who is responsible within a department for processing certain types of requests, such as timestamp alteration requests. This is the department leader by default, but this can be customised to match your needs.Read more: Responsibilities


Ready to Start Using TimeTac?
We hope this guide has helped you get up and running with our time tracking solution. If you have any questions, please feel free to contact us.
If you are ready to start using TimeTac within your company, then we suggest you return to the screen and click on . This will remove all the demo generated content that was present when you first logged in, such as demo users and demo notifications. It will not remove anything you have created yourself.
The next step is to head to the tab. This will activate your account so that you can continue to use it after the trial phase has ended.
Thank you for using TimeTac!


